The Complete Guide On Cottage Cheese Chocolate Chip Cookies
By all accounts, cards and chocolate chip treats have all the earmarks of being contrary, yet they are perhaps the best culinary mix. To know how to get ready delicate, delightfully sodden treats, loaded with protein, and have the rich cocoa flavor we revere, then this recipe is for you.
The guide will cover all the important details concerning cottage cheese chocolate chip cookies. Their distinctive advantages, along with a comprehensive recipe, will be provided in the guide. As we proceed, we will also elaborate on the best modifications to make these cookies your star treat.
Why Choose Cottage Cheese?
Nutritionally dense cottage cheese is underappreciated as an effective baking ingredient. This is how and why it is effective for chocolate chip cookies:
Moisture and texture:
Moisture indicates the level of water present in food. It plays a crucial role as an ingredient to determine the softness and freshness. The term texture pertains to the feel/consistency of the food when eating it, e.g., chewy, crispy, creamy, etc. These individual elements combined determine the eating experience of the overall dish, such as feeling light, heavy, and smooth.
Protein Boost:
As the phrase indicates, a protein boost is increasing protein to enable the development of muscle, the healing of tissue, and the promotion of general well-being. Foods such as trim meats, dairy, grains, and beans offer some of the best protein sources. This practice can be beneficial in controlling weight, increasing energy, and speeding up recovery from workouts.
Subtle Flavor:
What is subtle flavor? It is a gentle technique that accentuates a dish without overdoing it. It usually accompanies the infusion of an exquisite blend of herbs and spices. Subtle flavors are refined and sophisticated without being overpowering, as they provide complexity and richness.
Natural creaminess:
Natural creaminess is smooth and rich in flavor and texture derived from unprocessed ingredients, such as avocados, coconuts, and full-fat dairy products. It has an unsophisticated taste yet a deeply satisfying feel owing to the gentle mouth-coating effect without the need for industrial thickeners.
The Complete Guide On Cottage Cheese Chocolate Chip Cookie
4
servings30
minutes40
minutes300
kcalhe guide will cover all the important details concerning cottage cheese chocolate chip cookies.
Ingredients
2 cups all-purpose flour
1/2 teaspoon baking soda
1/4 teaspoon salt
1/2 cup soft butter
1/2 cup sugar
1 cup of cottage cheese (small curd works best)
1 large egg
1 teaspoon vanilla extract
- Mix-Ins:
1 1/2 cups of semi-sweet chocolate chips
Optional: 1/2 cup finely chopped nuts (good with walnuts or pecans)
Directions
- Start with the ingredients.
The first step of any dish is always to premix your ingredients. First of all, get everything you will need and start measuring them. For dry fixings like flavors, sugar, and flour, clustering can be a major concern, so filtering them is suggested. It will make everything in the recipe much smoother and the process of cooking more efficient. This effortless step ensures that everything is in order before cooking commences, helps mitigate the risk of scrambling around at the last minute, and makes sure that the dish tastes great.
- Combine the Dry Ingredients
In a separate bowl, combine and whisk the flour, baking powder, and salt. Sieve this mixture for later use. Independently blending the dry fixings is essential while baking or cooking to accomplish a uniform fuse of the relative multitude of fixings, including flour, sugar, flavors, and raising specialists. Start with the filtering of flour and the excess dry fixings, including parts, together in an enormous bowl. This prevents clumping and ensures the ingredients are well incorporated. If using spices like cinnamon or cocoa powder, mix them in to distribute their flavors evenly. Stir the dry ingredients thoroughly with a whisk or spoon to ensure consistency. This step helps create a uniform texture in your recipe, preventing any pockets of dry ingredients from forming during the cooking process.
- Cream the Butter and the Sugars
First, let us combine the dry ingredients in a bowl and set it aside so that we can use it later. Thank you for your time and attention. Now let’s do some mixing. Let’s first add some brown sugar (light or dark), castor sugar, and softened butter into the mixing bowl. Now we blend it all. The blend should be fluffy in texture. This should take about 5 minutes. Understanding the importance of fluffy blends is vital when measuring the rest of the ingredients.
- Incorporating the Cottage Cheese and Wet Ingredients
With regards to combining cottage cheese and wet ingredients, start by placing the cottage cheese in a large mixing vessel. Subsequently, pour in the wet ingredients, which can be milk, yogurt, or any other liquids prescribed in the recipe combination. Blend all the elements with a gentle motion, making sure the cottage cheese is thoroughly mixed with the liquids. The consistency can be adjusted to make it a little thinner by adding more milk or water if the mixture seems overly thick. This in turn is critical to giving the right texture, especially for recipes like pancakes, cakes, or savory dishes where a smooth batter or mixture is needed.
- Integrate Wet Components with Dry Ones
For the integration of the dry with the wet components, it is recommended to prepare them separately. This could mean preparing the wet components, which could include milk, oil, and eggs, along with dry components such as baking powder, sugar, or flour. First, pour in any liquid components slowly and gently stir the mixture with a whisk or a spatula. Overmixing must be avoided since it will make any baked product dense. Some lumps should be left within the mixture, which is at the stage of being close to being combined but not quite there. The idea is to mix the ingredients to a point where there is no clumping in the dough or batter, which will guarantee a light and soft batter or dough.
- Chocolate chip mixing
Ensure that your batter or dough is already mixed and smooth after wet and dry ingredients have been combined before proceeding to fold in the chocolate mixture. In this case, commence by evenly distributing the chocolate chips on top of the mixture and gently sprinkling them over. Next, taking the spatula, you will scoop the mixture from the base of the bowl and place it on the chocolate chips. Gently turn the bowl, and do the same from the opposite side. The aim is to lift the mixture over without incorporating too much air and breaking the chips or deflating the batter. This technique enables the batter to remain less dense while the chips are evenly blended in, which is why it is preferred over more vigorous methods.
- Scooping and Shaping the Dough
First, check whether the dough has been properly kneaded and is ready for portioning. Take even amounts of dough with a cookie scoop or a spoon. To ensure uniformity, adjust the amount to between 1 and 2 tablespoons based on the recipe. Place the dough in one hand and gently roll it with the other hand to form a smooth ball, or shape it into a disc or oval. If the dough is too sticky, lightly flour your hands or the scoop. Arrange the shaped dough on a baking sheet, ensuring that there is enough space for spread.
- Cookie Baking Time
Make sure to preheat the stove first to 350 – 375 degrees Fahrenheit (175 – 190 degrees Celsius) with the goal that the treats are heated equally. Continuously utilize a spoon to scoop the batter and put it at equivalent distances on a material paper-lined treat plate. This guarantees that the batter has more than adequate space to fan out. Treats are normally prepared for twelve minutes; however, watch out for the broiler to guarantee that treats don’t get overcooked. The edges of the treats are fresh, and the middle is delicate, so when they seem brilliantly brown, you realize they’re prepared. Subsequently, let the treats lay on the plate for a couple of moments before putting them on the cooling rack.
- Cool and relish
After baking the cookies, you should remove them from the oven and place them onto the tray for them to cool down for a minimum of 5 minutes. For easier transfer without accidental breakage, cooling the cookies for a while in the tray helps them firm up slightly. After these steps, transfer the cookies onto the wire rack for them to cool down completely. As the cookies cool down, the intense flavors develop while settling into a texture of soft or hard, depending on your preference. When the cookies have cooled down perfectly, pour yourself a glass of cold milk, coffee, or any of your favorite beverages and savor the taste of the cookies.
Recipe Video
Notes
- Make sure to thoroughly chill the dough; otherwise, the minimal folding can lead to excessive spreading. Also, carefully portioning is important to maintain a uniform size, while thorough baking ensures you achieve the all-important balance of crispiness and chewiness.
Perfect Cottage Cheese Chocolate Chip Cookies Tips
Some advanced tips for baking perfect cottage cheese chocolate chips include using small curds of cottage cheese for added smoothness and gentle folding while adding chocolate chips to maintain a good texture. Make sure to thoroughly chill the dough; otherwise, the minimal folding can lead to excessive spreading. Also, carefully portioning is important to maintain a uniform size, while thorough baking ensures you achieve the all-important balance of crispiness and chewiness.
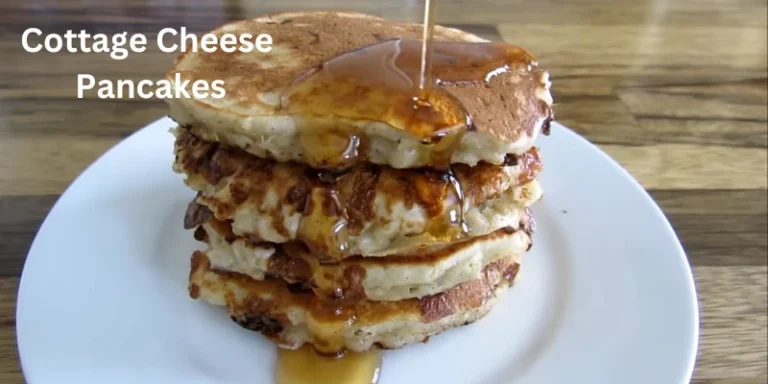
Also, try the cottage cheese pancakes for the best experience
Small-Curd Cottage Cheese Should Be Used:
Use small-curd cottage cheese for your recipe, as it provides the best texture and consistency. Small curd cottage cheese is ideal for blending batters or doughs and guarantees creaminess without large chunks. This type of cottage cheese adds a delicately gentle taste to make the cottage cheese chocolate chip cookies more perfect to the rest of the ingredients while giving the dish a light and tender result for baking.
Room Temperature Ingredients:
To accomplish an impeccably mixed mixture, it is smarter to utilize fixings like spread, eggs, and curds at room temperature. These fixings are simpler to work with, and accordingly, the hitter is uniform and the surface is infinitely better. Utilizing colder things might prompt conflicting blending or clustering, which would antagonistically influence the treats you are making.
Chill the Dough (Optional):
Although it is optional, chilling your dough is advisable. When mixed and put together, the ingredients tend to taste better when the fat is solidified, making the dough easier to work with. Additionally, cookies and other pastries tend to take a different low when unmolded; chilled dough does not spread as much while baking, which keeps the texture and shape more consistent.
Experiment With Add-Ins:
You can take your recipe to a higher level by getting inventive and evaluating new add-ins. For example, nuts, chocolate chips, dried natural products, or flavors like nutmeg or cinnamon. To have a great time, you can place in some destroyed coconut, squashed pretzels, or some citrus zing. When you can customize your recipe, you can add different flavors you enjoy.
Nutritional Benefits
Use properly balanced ingredients to enhance the positive aspects of your recipe. Grains with fiber, nuts, and seeds, which provide healthy fats splashed with protein, are a step in the right direction. Additional fruits like bananas and berries will add a boost in vitamins and strengthen antioxidants.
Protein:
Curds are one of the best wellsprings of protein that keep you satisfied for a drawn-out timeframe. Protein helps in tissue arrangement and fixing, muscle improvement, as well as, by and large, prosperity. I suggest including high-protein fixings like eggs, nuts, seeds, Greek yogurt, or even protein powder; they make certain to enhance your dishes and keep you undeniably more fulfilled.
Calcium:
Calcium is essential in the growth of bones and teeth as well as for effective muscle activity. Add some dairy, nuts like almonds, or even fortified plant-based milk to your dishes and expect a mouthwatering yet efficient way of promoting bone and overall health.
Lower Fat Option.
Make your recipe healthier by substituting these with lower-fat options. You can replace butter with Greek yogurt and even applesauce. You could use low-fat milk and plant-based milk instead and do away with heavy cream altogether. Instead, use coconut milk or evaporated skim milk. These changes in your ingredients are sure to lower fat content without compromising on taste, keeping your dish delicious and airy.
Storage and Freezing Tips
Storing cookies:
Put cooled cookies in a container with no pores and store them at room temperature to prolong their freshness for up to four days. For more than four days, you can refrigerate them and expect them to last for an entire week.
Batter Freezing:
Put the treat batter on a baking plate and put it in the cooler until it solidifies or sets. Move the frozen mixture balls to a cooler-safe sack or compartment. They can be put away for as long as 90 days.
Heat the frozen mixture straightforwardly from the cooler, adding 1-2 minutes to the baking time.
Freezing Heated Treats:
Orchestrate the prepared treats in a solitary layer in a cooler safe holder, isolating layers with material paper. They can be frozen for as long as 90 days. Defrost at room temperature before serving.
Imaginative Turns on the Recipe
Add an imaginative twist to your recipe by trying different things with surprising flavors and surfaces. Imbue batter with flavors like cardamom or ginger, consolidate a twirl of Nutella or jam, or utilize remarkable garnishes like ocean salt pieces or edible blossoms. Play with shapes, layers, or fillings to make it genuinely special!
Twofold Chocolate Enjoyment:
Enjoy twofold chocolate joy by consolidating rich cocoa powder with lumps of dim or drained chocolate for a wanton treat. Upgrade the flavor with a touch of coffee powder or a sprinkle of vanilla. For additional surface, add chocolate chips or sprinkle dissolved chocolate on top for a definitive encounter.
Peanut Butter Euphoria:
Enjoy the smooth, nutty integrity of peanut butter rapture! Mix rich peanut butter into your recipe for a smooth surface and strong flavor. Improve it with chocolate chips, squashed peanuts, or a whirl of jam for an exemplary win. Ideal for fulfilling desires and making a soothing, liberal treat.
Cereal Variety:
Go ahead and make a recipe change with an oat variety that adds one more layer of taste and nourishment. Moved oats to upgrade the flavor, making it nutty and good. You can add raisins, dried cranberries, or cinnamon. For extra advantage, add flaxseeds or chia seeds for a scrumptious bite that is rich in sustenance and is an outright joy to eat.
Occasion Version:
Improve the occasion with a vacation version of your recipe! Upgrade the kind of recipe with warm flavors like cinnamon, nutmeg, and cloves, or put squashed treat sticks, dried cranberries, and white chocolate chips. Treats can be made in any shape for the event and can be finished off with powdered sugar or hued sprinkles for additional wizardry.
Frequently Asked Questions
May I add low-fat cottage cheese?
Indeed, low-fat curds can be utilized for this recipe easily. Notwithstanding, full-fat curds taste much better and have a creamier surface.
What should I do if I have no electric mixer?
With a wooden spoon or whisk, ingredients can be mixed by hand. Just be certain that the butter is extremely soft to ease the creaming process.
Are these cookies able to be made gluten-free?
Of course! The all-purpose flour can be replaced with a gluten-free baking mix that consists of Nathan gum for the proper structure.
What steps can I take to ensure the cookies are not spread overly thin?
Considering that chilling the dough for thirty minutes and overcrowding butter and sugar are detrimental to this cause.
Conclusion
Curds chocolate chip treats udon for the deliciously wanton curds treats that are intertwined flawlessly with chocolate chips. These treats are youth and adult all around, arranged because they are fragile, stacked with flavors, and contain supplements. This one is for you, whether you are a subject matter expert or a juvenile in the kitchen. Aggregate all of the materials for cooking, turn the oven on, and prepare to get ready to deal with it like you won’t ever get insight.